Hosting Hugo site on Azure Static Web Apps

Recently when I decided to start my own blog, one of the first questions I had where and how I’m going to host it. Long story short I’ve decided to use Azure Statics Web App , because Azure provides a free account. So, if it is free why not 😄.
Prerequisites
Because you are reading this post I can assume you already have Hugo site that you want to host, if not just follow this installation guide to create one. Also you need to have a GitHub account. And obviously you need to have Azure account.
Create Azure environment
Lets create our new Azure Web Static App.
- Navigate to the Azure portal .
- On the Home screen click Create a resource button.
- In the search box type
Static Web Apps. - Select Static Web Apps and click Create button.
- On the Basic tab
- Subscription: select you subscription.
- Resource Group: click Create new and enter name you like.
- Hosting plan: select free type.
- Azure Functions staging details: select region closest to you, see this or this map.
- Deployment details: select GitHub option.
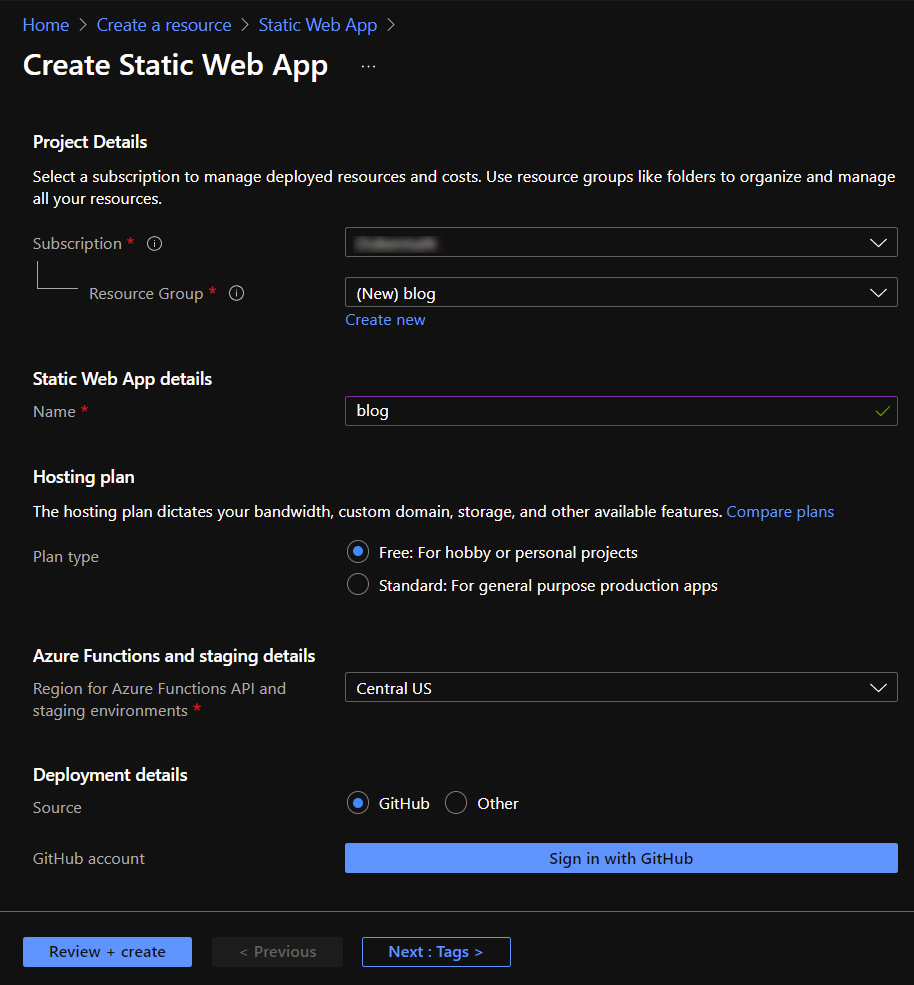
- Click Sign in with GitHub and follow instructions to authorize Azure to access to your repository
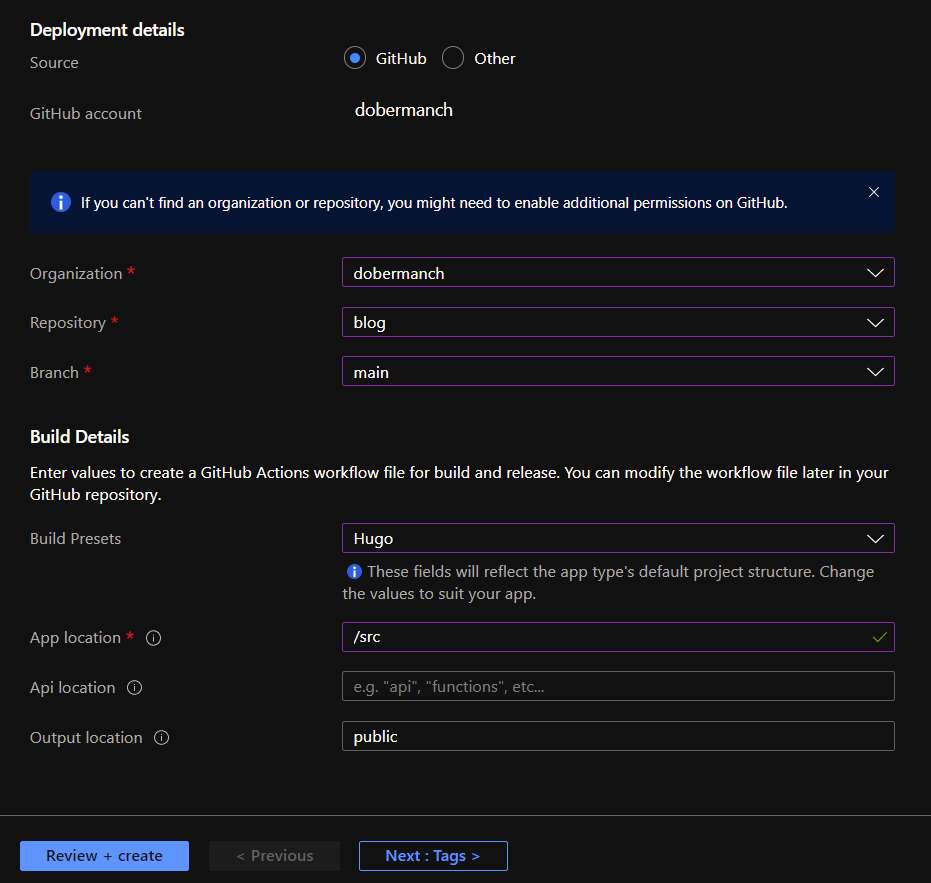
- Organization: select you GitHub organization.
- Repository: select repository where you store you Hugo site
- Branch: select you branch which will be used for deployment
- Build Presets: select Hugo
- App Location: select folder where Hugo sources is located. Leave it as is if in the root folder or specify exact path.
- Api location: If you do not have Azure Functions live it empty, otherwise specify path to your Azure Functions folder.
- Output location: if you did not override it in your
config.tomlleave it as is. - Click Review + Create and then Create buttons.
☕ Now wait until Azure creates environment.
Azure creates GitHub Actions in you repository to deploy your site. Basically, every time you check in changes to the branch you have selected above, this action automatically deploys your site to the Azure Static Web App.
When environment is created, click Go to resource button. Now you should see you Static Web App.
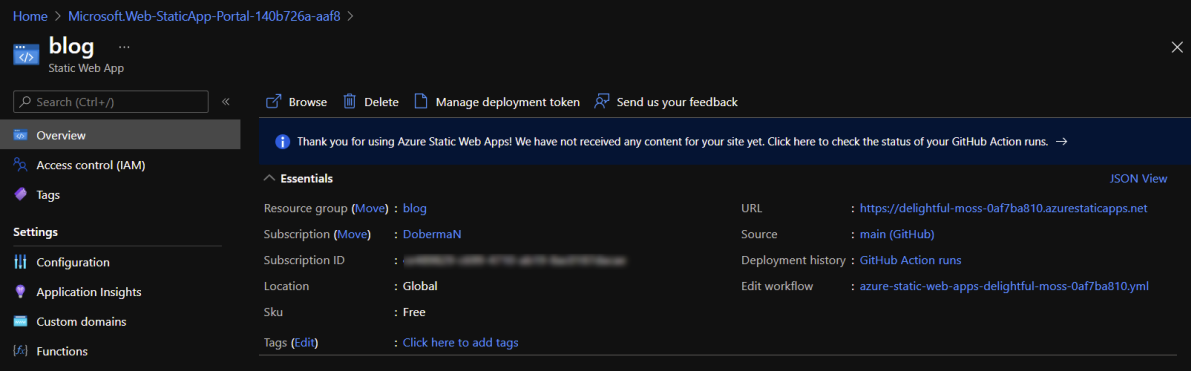
To verify that you site was deployed just click the URL link. Basically that is it, your site is deployed.
Setup custom domain
To continue with this section you need to purchase a domain. You may use any registrar you want like GoDaddy , Google Domains , etc.. The steps bellow in general will be the same for any domain registrar.
As an example I’m going to use Google Domains and my blog domain name libertus.dev. So, to configure your Custom Domain
-
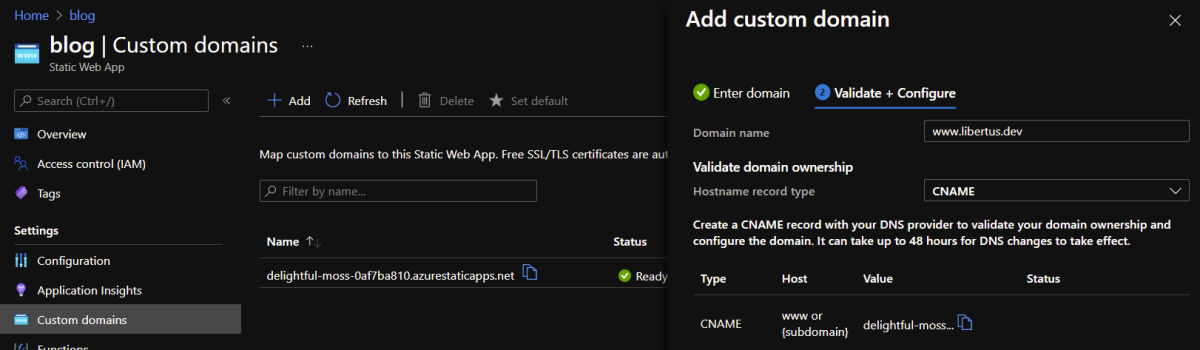
Go to Custom Domains tab
- Click Add button.
- In appear window
- Domain name: enter you domain name starting with
wwwsubdomain, e.g.www.libertus.dev. - Click Next button.
- In the table below copy Value and click Add button.
- Domain name: enter you domain name starting with
-
Now go to you domain registrar web site in this example Google Domains
- Go to My Domains.
- In the My domains list select your domain.
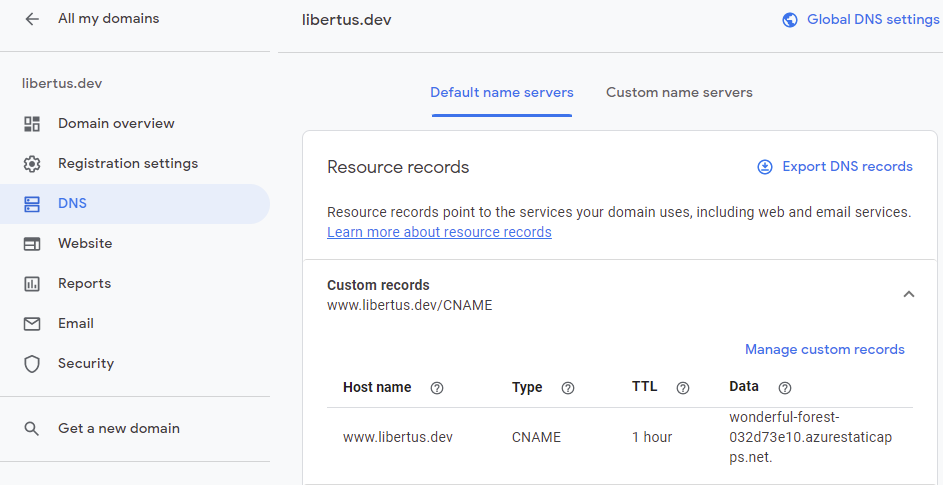
- Go to DNS page.
- Select Default name server.
- Click Custom records and then Manage custom records buttons.
- Click Create new record
- Host name: enter
www. - Type: select
CNAMEtype. - TTL: leave as it is.
- Data: enter value copied on the Azure portal earlier.
- Click Save button.
- Host name: enter
-
Go back to Custom domains page on Azure portal
- Click Add button.
- Domain name: this time just enter your domain name e.g.
libertus.dev. - Click Next button.
- In the Value field click Generate code button.
- Copy generated value.

- Domain name: this time just enter your domain name e.g.
- Click Add button.
-
Go to you domain registrar web site
- Navigate to the same page as before.
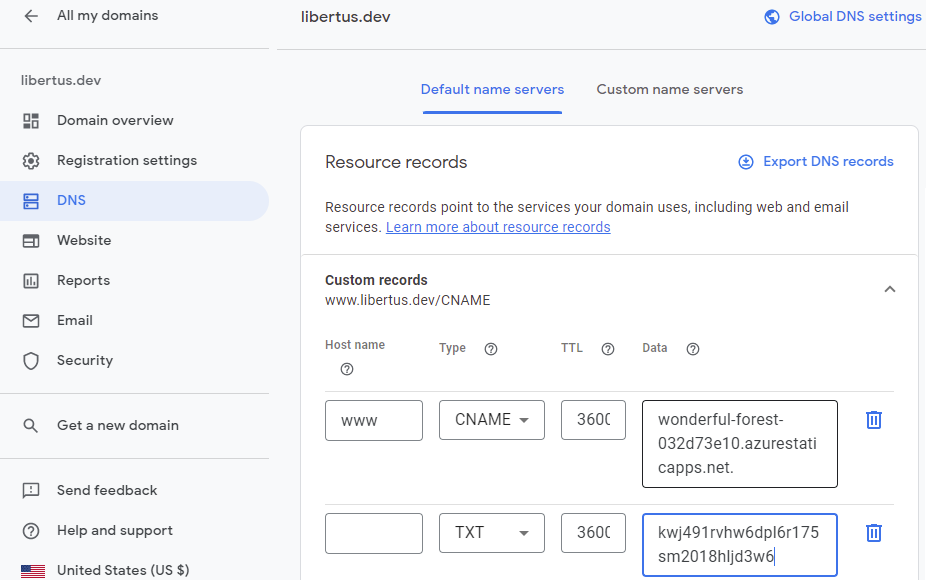
- Again click Create new record
- Host name: leave empty. NOTE: other domain registrar may require to enter
@. - Type: select
TXTtype. - TTL: leave as it is.
- Data: enter value copied on the Azure portal earlier.
- Click Save button.
- Host name: leave empty. NOTE: other domain registrar may require to enter
-
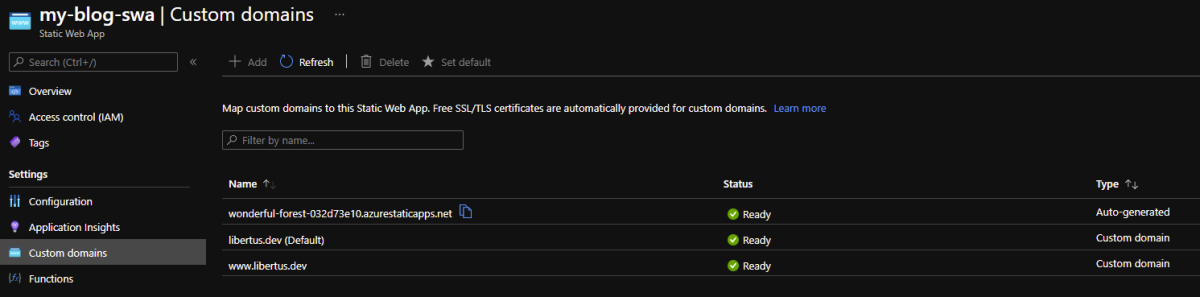
Go to the Custom domains page on Azure portal
- Select
www.libertus.devdomain. - Click Set default button.
- Select
☕ Now we should wait until validation process is completed. Be patient, it may take some time from minutes to 48 hours depends on you domain registrar.
Configure naked domain address (Optional)
A naked domain is simply a domain address without the www prefix, such as libertus.dev (naked) and www.libertus.dev (non-naked).
Unfortunately, Google Domains does not allow to configure naked domain (allows only for Google Workspaces), but some other domain registrar may allow to configure it. Instructions bellow are generic and should work for any registrar that supports this feature.
-
Go to the Custom domains page on Azure portal
- Copy Auto-generated domain name.
- Copy Auto-generated domain name.
-
Go to you domain registrar web site
- Navigate to the same page as before.
- Click
Create new record- Host Name: enter
@. - Type: it may depend on you domain registrar, but normally it may be one of
Alies,A/AAAor eventCNAME. - Data: paste domain name copied above.
- Click Save button.
- Host Name: enter
-
Go to the Custom domains page on Azure portal
- Select
libertus.devdomain. - Click Set default button.
- Select
☕ Now we should wait until changes will be applied. Be patient, it may take some time from minutes to 48 hours depends on you domain registrar.